While Google has put a halt on banning third-party cookies (for now), the direction of data management in marketing is still trending to privacy-first approaches.
Why? Beyond basic data-regulation compliance, there are methods for getting more accurate and reliable conversion tracking data without using third-party cookies. One of the most useful methods is using conversion APIs.
In this guide, we’ll help you understand what conversion APIs are, implementation steps, best data accuracy practices, and how to unify conversion data for better marketing insights.
What is a Conversion API?
A conversion API is a server-to-server method of transmitting conversion data directly from your server to ad platforms.
These APIs work by collecting and sending data between servers rather than from a user’s browser on the client-side, like you would with a tracking pixel. Here’s a quick overview of the differences between server-side tracking and pixel-based tracking:
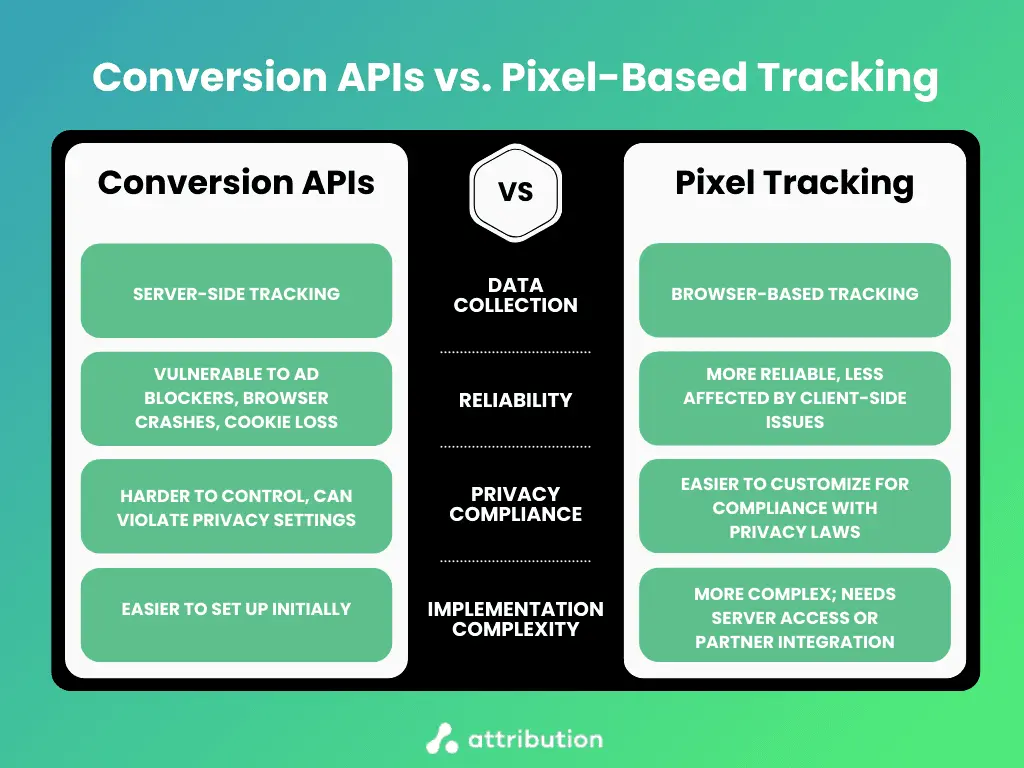
A few aspects of server-side tracking can make it superior in some situations, which include:
- The ability to bypass ad blockers, which helps you avoid data loss.
- Helps avoid browser limitations such as session time-outs and payment gateway redirects.
- Gives you more control over your business’s data.
The only practical downside to using conversion APIs is the initial setup of your data streams. But we’ll show you how to do this step-by-step below.
Book a Demo
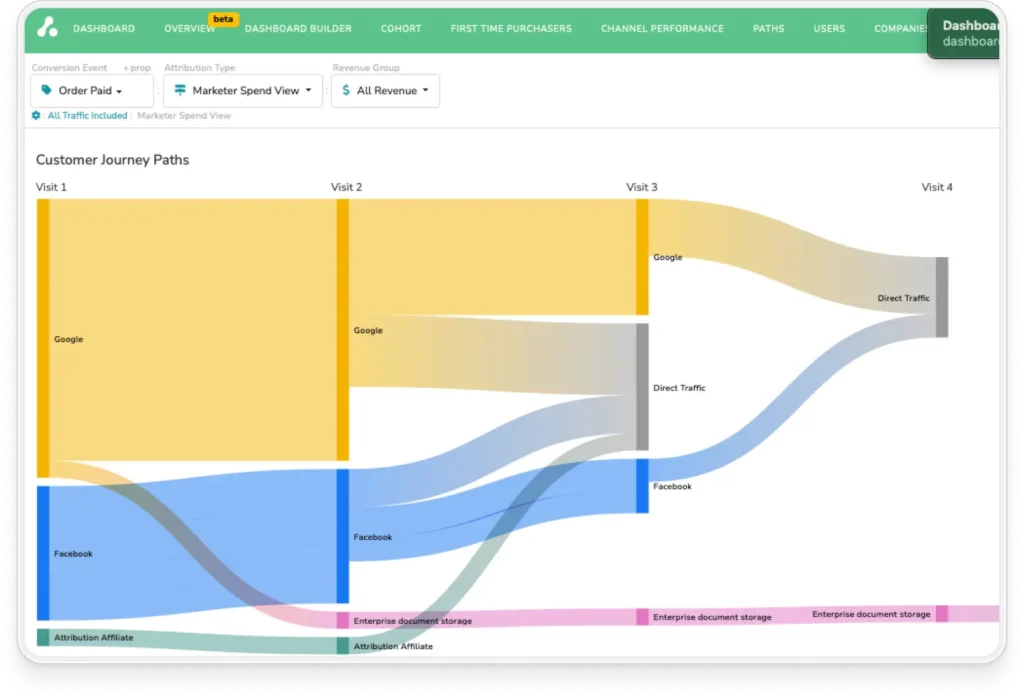
Consolidate your conversion data and track “true” CAC, ROAS, and ROI on marketing spend with The Attribution Platform.
How to Set Up Conversion APIs on Major Platforms
In this section, we’ll show you how to set up conversion APIs on the following platforms: Meta, Pinterest, Google Ads, Shopify, and WordPress.
Meta’s Conversions API Setup Guide
Before starting, make sure you have Business Manager access and developer resources for server access. It also helps to have some API knowledge to understand the technical details. Either way, here are the basic steps you need to take:
Step 1: Generate an access token:
- In Business Manager, go to Events Manager > select your Pixel > Settings.
- Under Conversion API, click “Generate Access Token”.
- Save this securely—you’ll need it for server calls. Here’s the official guide for setting up the tokens.
Step 2: Define your events:
- Identify key actions (e.g., purchases, signups) and gather parameters like “event_name”, “event_time”, “user_data” (hashed customer information like email).
- Here’s an example JSON call:
{
“event_name”: “Purchase”,
“event_time”: 1714370000,
“user_data”: { “em”: “hashed_email” },
“custom_data”: { “currency”: “USD”, “value”: 29.99 }
}
Step 3: Implement the API:
- Send secure HTTPS POST requests to:
“https://graph.facebook.com/v19.0/<PIXEL_ID>/events?access_token=\<ACCESS_TOKEN\>“
Step 4: Test your setup:
Use Event Manager’s Test Events tool to verify receipt and formatting by using “Test Event Code” in your payload or server setup. You’ll see a unique string like “TEST123ABC”. Include this in your server request by adding the field “test_event_code” to your payload. Here’s an updated example:
{
“event_name”: “Purchase”,
“event_time”: 1714370000,
“user_data”: { “em”: “hashed_email” },
“custom_data”: { “currency”: “USD”, “value”: 29.99 },
“test_event_code”: “TEST123ABC”
}
Your test event should appear almost immediately under “Received Events.”
If you decide to use both browser Pixel and server-side tracking, always pass a shared “event_id” with both calls. This helps Meta deduplicate events and avoid double-counting conversions.
Pinterest Conversions API Implementation
Similarly to the process with Meta, you’ll need a Pinterest Business Account to access the Pinterest Conversions API (CAPI). From there, follow these steps:
Step 1: Generate an access token:
- Click “Ads” in the top menu and choose “Conversions.”
- Select the “Set Up API” page from the left-hand navigation.
- Click the “Generate new token” button.
- If you have a developer team, copy the new access token and your account ID, then share it with them.
Step 2: Define and align events:
- Map your events to Pinterest’s standard conversion actions like “checkout”, “signup”, “lead”, or “add_to_cart.” Here’s the developer documentation that shows Pinterest’s event formatting.
- Match these events to your campaign objective (e.g., use “checkout” for Purchase campaigns).
Sample event payload:
{
“event_name”: “checkout”,
“event_time”: 1714370000,
“user_data”: { “em”: “hashed_email” },
“custom_data”: { “currency”: “USD”, “value”: 49.99 }
}
- Make sure the data is being passed in real time (less than an hour) to offer real-time optimization, attribution, and measurement.
- For best performance, include as much hashed user data as possible, such as email, phone_number, IP address, user_agent. This hashed data helps improve Pinterest’s ability to match conversions to ad interactions.
Step 3: Verify your events
Test your events by passing them through “Events Manager”:
- Review the response codes returned with each request. Here’s the endpoint you can use to test events:
- In the “Conversion Tab” within the Ads Manager, you’ll find your “Test Events” in the left navigation. The “Test Events” will show warnings if there are any issues.
Pinterest also has a specific place for finding de-duplicated conversions for Pinterest Tag (browser tracking) and Conversion API events:
- Click “Ads” in the top menu and choose “Conversions”.
- Select “Deduplication” from the left-hand navigation.
It’s worth noting that the Pinterest Conversion API lives within the Pinterest API ecosystem, but it doesn’t automatically grant you access to the wider Pinterest API.
Google Ads Server-Side Tracking Configuration
Google Tag Manager functions very similarly to a conversion API, though the setup is a little different:
Step 1: Set up a Google Tag Manager server container
- In Google Tag Manager, click “Admin” > “Create Container.”
- Choose “Server” as the container type.
- Select your hosting option:
- App Engine (Google Cloud)—for simplicity and scalability.
- Self-Hosting—Deploy on your own server infrastructure (you’ll need technical support to maintain it).
- Deploy the server:
- If you’re using App Engine, GTM will guide you through setting up a project on Google Cloud Platform (GCP) and deploying automatically.
- If you’re self-hosting, download the server-side container files and follow deployment instructions specific to your hosting setup.
- Obtain your server container URL. This will look like “https://gtm.yourdomain.com” or a GCP-generated URL.
- Update your web GTM container:
- Add a new Client in the server container to listen for incoming web requests (like GA4 events, Ads click IDs).
- Adjust your web container tags to send events to your server URL instead of directly to third-party platforms.
Step 2: Connect Google Ads
- In GTM’s Server Container, create a new “Google Ads Conversion Tracking tag.”
- Select “Conversion Linker” to properly attribute conversions server-side.
- Input your Google Ads Conversion ID and Conversion Label, which are available in your Google Ads account under Tools > Conversions.
Step 3: Configure events and parameters
- Use triggers based on incoming client events (e.g., purchase, signup).
- Pass key parameters like “transaction_id”, “value”, and “currency”. Here’s a JavaScript example:
{
“transaction_id”: “123ABC”,
“value”: 199.99,
“currency”: “USD”
}
Step 4: Test and validate
- Use GTM’s Preview Mode to test server container setups.
- In Google Ads, monitor the Conversion Diagnostics tool to validate incoming events.
- Check that parameters are complete and match campaign goals.
If you’re using web-based tags as well as server-based tags, you might run into similar duplication issues as other platforms. To avoid duplicate event data, use unique transaction IDs and configure the deduplication settings in Google Ads tags.
Shopify Conversion API Integration
We already have a whole guide on setting up Shopify conversion data using the Google Analytics and Shopify integration, so we won’t go into fine detail here. We’ll cover the basics of what you need to know, and if you need technical details, refer to the linked guide above.
You have three main options for getting conversion data from your Shopify store (beyond Shopify’s native analytics dashboard). These options are:
- Using Shopify’s native Google Analytics 4 integration—simple and easy setup, but offers limited ecommerce conversion data compared to other ecommerce analytics tools.
- Installing GA4 via Google Tag Manager—more complex setup, but offers more control and flexibility.
- Using a third-party Shopify app—gives you the ecommerce conversion data you need, but relies on third-party services (which means less control of your data).
While the other two methods are simpler, we’d recommend installing GA4 via GTM yourself (or with the help of a developer). The full walkthrough is in our guide:
How to Set Up and Audit Google Analytics on Shopify
But in short:
- Set up a Container in Google Tag Manager for your store.
- Create your tags in the “Tags” menu to get a Tag ID.
- Configure your properties, event settings, and triggers.
- Create a backup of your Shopify store theme, then paste the Tag ID code snippet in your store’s theme code.
- Test to check if events are firing.
You can debug the same way you would with any other GTM property by using Preview Mode, using this approach.
WordPress Conversion API Implementation
If you run your site using WordPress (or WooCommerce), you’ll have a few options for server-side tracking using plugins. Here are a few plugins that are worth checking out to see if they suit your needs:
- Site Kit by Google—Basic integration with Google services, but limited server-side options.
- PixelYourSite—For a paid and premium option, it adds advanced server-side support for Facebook CAPI, Google Ads, and more. The site also suggests it now supports GTM.
- WP Server-Side Tracking—Focused on server-to-server event forwarding without bloated features.
- WooCommerce Integration Plugins—If you run WooCommerce, many dedicated plugins like “Pixel Manager for WooCommerce” offer built-in server-side support.
To capture appropriate conversion data using these plugins, you’ll need to set up GTM. But there are other options, including:
- Form submissions—Use plugins like Gravity Forms or WPForms with webhook or API add-ons to capture submissions and forward to server endpoints.
- E-commerce transactions—If you use WooCommerce, server-side plugins can automatically track purchase events and cart actions.
- Custom conversions—Install GTM (with a server-side container) via plugins like “GTM4WP” and configure triggers for custom post types, button clicks, or scroll events.
Since WP offers a slightly different approach using plugins, you can run into a few issues unique to the platform:
- Missing server container connection—Double-check that your GTM server URL is correctly configured in plugin settings.
- Event parameter issues—Make sure all required fields (like “transaction_id”, “email”) are correctly passed and, if needed, hashed.
- Caching conflicts—Disable page caching for form confirmation or checkout pages to prevent event suppression.
As you can see, many conversion APIs follow similar setups (get token, define events, test). If you use any conversion APIs not listed here, it’s best to look for developer documentation for the tool you’re using.
Best Practices for Data Accuracy and Attribution
During your setup of conversion APIs, you’ll need to get familiar with best practices for data accuracy and attribution. If you don’t, you’ll find it much more difficult to keep your data organized and usable. Here are some of the basic best practices to keep in mind.
Event Mapping and Naming Conventions
To get the best results from conversion APIs, use the same event names (like “purchase” or “sign_up”) across all platforms. Make sure you include key details like the page URL, hashed customer identifiers (such as email or phone number), and the event time to track results accurately.
Keeping your event data organized and consistent this way makes it easy to check and fix if something goes wrong.
Deduplication Strategies
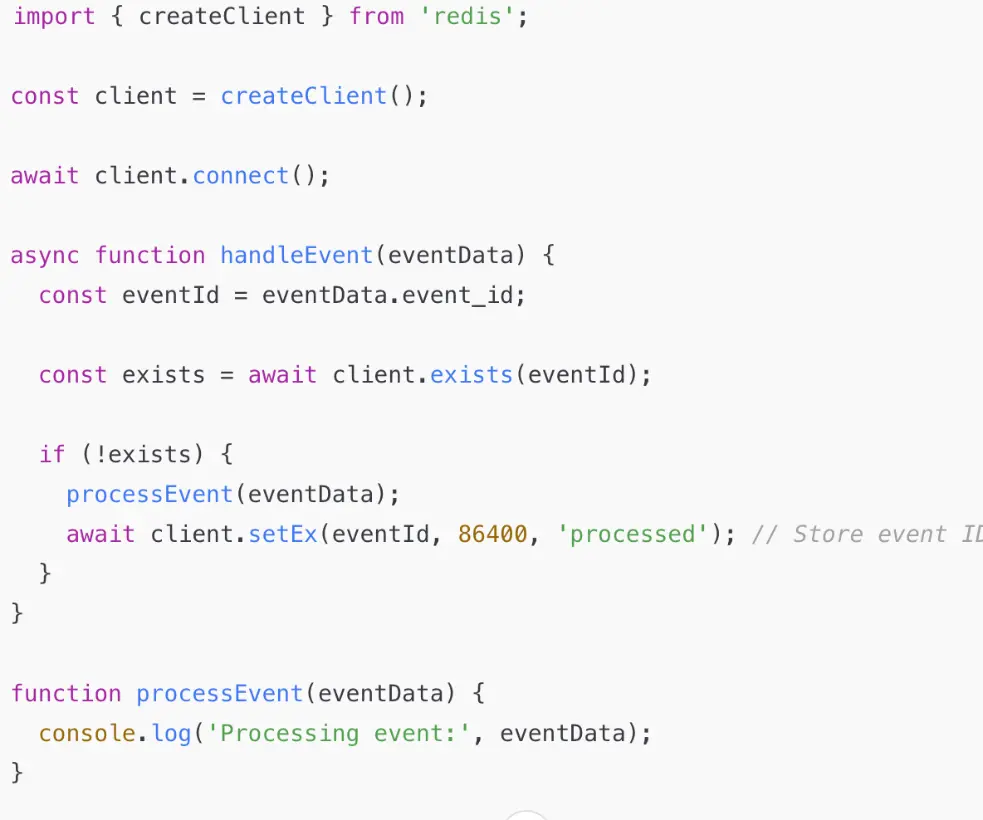
If you decide to use multiple tracking methods like pixels and APIs together, you’ll need to prevent duplicate conversions by passing a unique event ID with each conversion. Platforms like Meta and Google Ads have built-in deduplication settings that match events by ID.
You can also add custom deduplication logic by checking if an event ID has already been processed before accepting or sending it by using database or cache lookups in your code. Depending on the version of Redis you use, your code may look a little something like this (if using JS):
If you’re using JavaScript for tracking, be sure to check out our guide to avoid data loss:
Why Your JavaScript Tracking Leaks Data
Align Conversion APIs with Multi-Touch Attribution
Server-side tracking with conversion APIs improves multi-touch attribution by capturing events more reliably.
To support different attribution models (like last-touch, time-decay, or data-driven), you should structure your event data with clear timestamps, user identifiers, and consistent event types as above. To make it easier to link actions back to specific touchpoints, add campaign metadata—like source, medium, and campaign IDs directly to your events.
Using this approach, you reduce data loss, which gives you a fuller view of the customer journey.
Data Validation and Quality Assurance
We recommend setting up regular audits where you review event logs for missing fields, inconsistent event names, or mismatched timestamps, to keep conversion data accurate.
You should also compare your server-side data against other sources like CRM systems, native analytics platforms, or pixel-based tracking (if you’re still using them) to catch issues early.
For ongoing monitoring, use tools like Facebook’s Event Manager, Google’s Tag Assistant, or custom dashboards using BigQuery or Looker to spot issues and stay confident that your data is reliable.
Privacy Compliance with Conversion APIs
Marketers are turning to conversion APIs as an alternative for third-party cookies because of better privacy compliance. But that doesn’t mean the APIs are 100% compliant by default.
GDPR and CCPA Considerations
When you use either client-side or server-side tracking, you need to obtain clear, informed consent before collecting or processing any user data. That’s a requirement for GDPR and CCPA regulations.
You should respect opt-outs by tagging events with consent status and ensuring that you don’t track or store any personal data from users who decline it.
While you’re there, we also recommend keeping a secure consent log that records when and how each user gave or withdrew consent. This is useful in the event of a GDPR or CCPA audit.
You should also apply strict data minimization and purpose limitation principles. Only collect the information absolutely necessary for attribution, and only use it for the specific purpose the user agreed to.
Secure Data Handling Practices
To protect personal data, we recommend hashing identifiers like emails and phone numbers (which we’ve mentioned in the guides above). You can do this using a secure algorithm such as SHA-256 before sending them through your conversion API.
Privacy compliant identifiers usually include hashed emails, phone numbers, user IDs. But make sure you’ve got consent to process them first.
You should also define a clear data retention policy. Only store user data for as long as it’s needed for attribution or reporting, and set up an automatic deletion schedule to reduce long-term risk.
Create a Privacy-First Tracking Framework
To build a privacy-first tracking framework, you should design your measurement strategy around user consent, strict data minimization, and clear purpose limitation from the start.
Conversion APIs naturally fit into a consent-based model by allowing you to send only the data users have agreed to share, while keeping sensitive information secure through hashing and server-side controls.
On a practical level, a privacy-friendly approach can include using consent banners tied to server-side event triggers, hashing all personal identifiers before transmission, and setting up regular audits to review data collection practices.
Unify Conversion Data with The Attribution Platform
If you’re using multiple channels for your acquisition strategy, monitoring and measuring them all separately would take significant time and energy.
The Attribution Platform helps you consolidate your conversion data from multiple sources, including GTM, CRMs, conversion APIs, payment systems and more. All of which unifies your data into one dashboard, offering you a holistic and complete view of the customer journey.
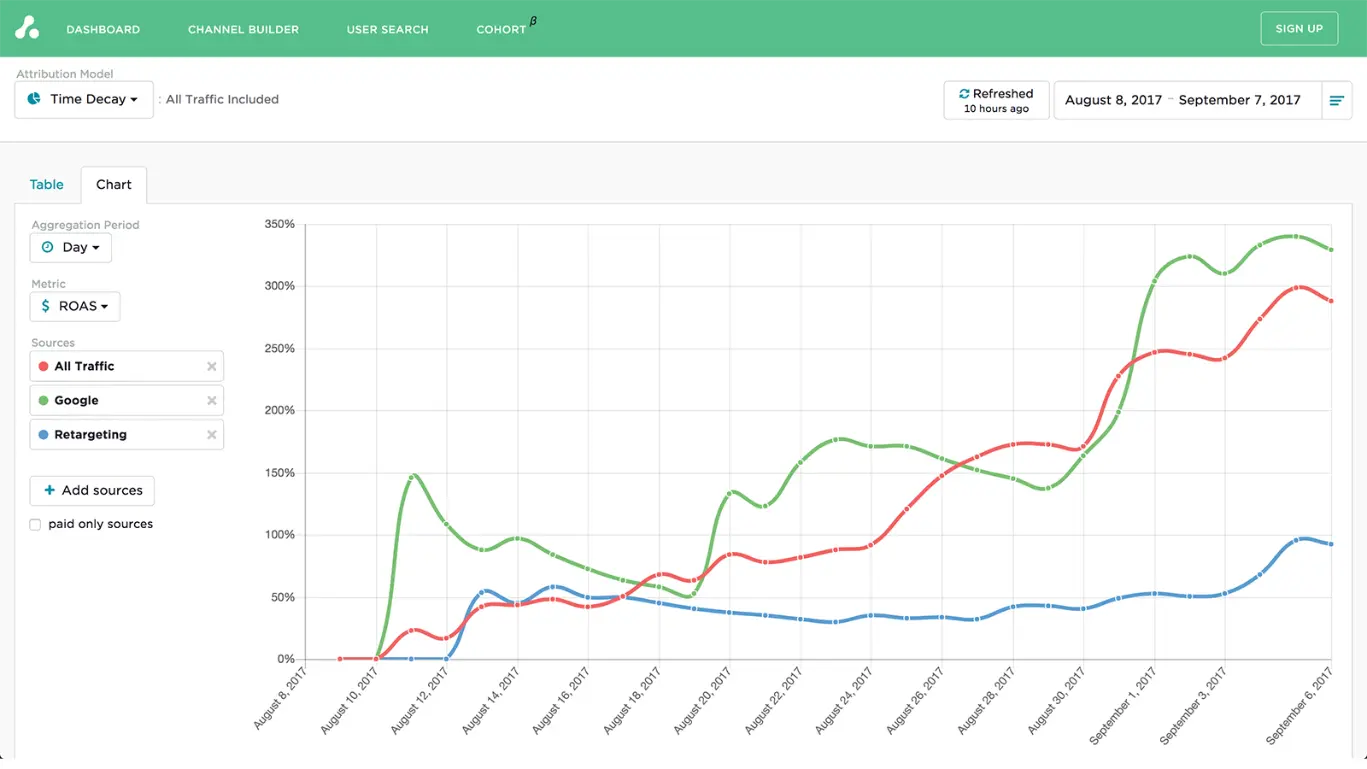
The Attribution Platform’s multi-touch attribution capability shows you the true value of your data with several server-side integrations with popular marketing platforms. You can identify overlapping campaigns, get detailed user histories, see your ROAS by cohort, compare ROI, and more.
You can analyze clear and accurate conversion data for insights on finding the best performing channels and double-down, and decide if the worst-performing channels are still worth investing in.
With the help of The Attribution Platform, ClickUp were able to scale into market leaders. They grew from $4M to $150M annual recurring revenue within three years.
Sign up and try Attribution today — pinpoint CAC by channel, audit funnels and conversion rates, scale revenue-driven content marketing, measure affiliate LTV and CAC (and more).
Conversion API FAQs
What is the main benefit of using a Conversion API over a traditional pixel?
The main benefit of conversion APIs over pixels is greater control over the data for privacy regulation compliance.
Can I use both pixel-based and server-side tracking at the same time?
You can, but you risk generating duplicate conversion data. For example, if you do use both with Meta, use shared eventIDs with both calls to avoid duplication.
How does a Conversion API affect page load speed?
Short answer—it doesn’t. A properly implemented conversion API doesn’t directly affect page load speed because it happens on the server-side, not in the user’s browser.
How can The Attribution Platform help maximize the value of my Conversion API data?
The Attribution Platform helps you maximize conversion data by unifying your data streams into one, easy-to-use dashboard, which gives you the full-funnel view of your customer’s journeys, and the real ROI, ROAS, CAC (and more) of each channel. Giving you the insight you need for informed budget allocation.
